Polymer clay face molds for babies and fairies

currency is in U.S.Dollars. NEW VIDEO or DVD or CD format for those who like me are visual learners. this movie is on sculpting the body of an itty bitty baby, I use mold # 5 and #36 and you watch me sculpt 2 bodies. $29.95 is a 3 mold set with DVD. $39.95 is a 5 molds set and dvd and $49.95 is a 7 mold set and dvd. You can also buy any number of molds for $5 each, Just go to the new paypal cart order page . Instructions on the use of push molds follow the pictures.

#5 itty bitty baby face mold about 1/2 inch.
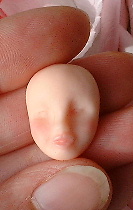
also #55 fairy face 3/4 inch


Using your New Press Mold

. A mold release is necessary as the raw clay would stick to the mold and become impossible to take out without distorting it. Lightly powder the mold with cornstarch or powdered makeup in appropriate color. An alternative method would be to use a wet release such as water or saliva brushed into the mold. Form a ball of clay and roll between your fingers to make a point at one end of the ball. This is pressed into mold cavity nose first in order to completely get the tiny nose. Press clay into mold and cool to stiffen clay. Soft clay would distort when pulled out of the mold. Ten minutes in a fridge usually works for me. Loosen the sides and remove carefully with a knife tip or toothpick inserted into the clay about half way and at an angle. Examine the piece for missed areas. Placing the clay back into the mold does not work, re soften the clay and start over. This can take a little practice at first. Now is the time to resculpt the clay if you wish to make the mouth more open or closed, and time to add prebaked eyes, or to add the ears. To insert the eyes, first indent the place with the tip of your knitting needle that is closest in size to the eye, and then push the eyes in making sure they line up. For the animals I usually use dark brown clay that matches the antiquing medium used. For dolls I use white clay and paint the iris and pupil on after baking with the tip of a needle dipped in acrylic paint lightly and then lightly touched to the eye and an even smaller amount of the black for the pupil. Or a touch with a felt pen such as Pigma brand. Remember to test any other felt pen on baked clay for running or bleeding first!! This takes some practice. An alternative would be to use say, a blue ball of clay for the eye and leave as is. Some also use a glass bead with the hole facing out as the pupil. After baking you may add a little gloss to the eye with a clear gloss such as future floor wax or Flecto Diamond Elete varathane. After inserting the eye a tiny roll of clay may be smoothed into the top quarter of the eye to make an eye lid. For faces, colour the lips and blush the cheeks with coloured powders such as makeup or leave as is and paint with acrylic paint after baking. Bake at 265 to 275 degrees F for 20 minutes per 1/4 inch for most polymer clays but best is to follow the baking times on the package of clay . For baby face molds I bake for 10 minutes only. It will get the final cure with the rest of the body. I then add the back of the head to the baked portion,(It is easy to smooth the raw clay into the baked face) and attach this to the body. This is way easier than havig to worry about smearing the face while sculpting the body. I include sculpting instructions for small baby bodies with the molds. Cheryl Trottier


links to more pages of mine

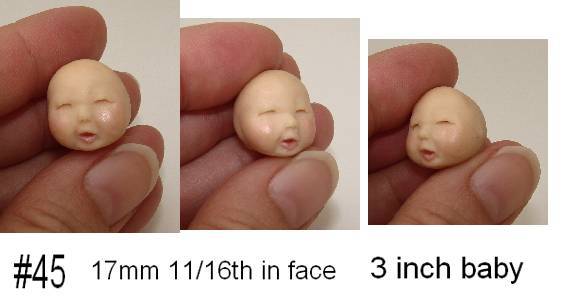
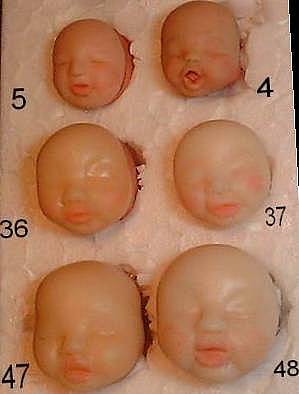
mold page 1: baby face molds and examples
back to home page: